Sunday, May 25, 2014

BLT Chicken Burger


Ahh Memorial Day. The first long weekend of the outdoor season. Time to throw on your stunna' shades, crack open a cold one and fire up the grill.  

This presents a problem for people like me who don't have any outdoor space. Sure I could fight for the use of a coal pit at the local park.  But based on where I live, this sort of altercation would likely result in me getting knifed.

I don't want to be a statistic. I just want a nice, post-modern burger. 

That's why I played it safe this Memorial Day and baked my burger in the oven. Short on grill marks, big on chickeny goodness. 

Enjoy an altercation-free holiday with this upscale BLT chicken burger!


Ingredients:
2 sundried tomato chicken sausages (Al Fresco; it's pre-cooked!)
1/2 cup frozen kale
4 strips of bacon, cooked (crispy!)
1 tbsp extra light olive oil
1/2 vidalia onion
2 corn english muffins

Serves 2, or 1 super hungry person
Time commitment: 30mins
Estimated cost: 12$

I know, I know. Chicken sausage? Again?? Just trust me, okay? Have I steered you wrong so far? (Read: rhetorical).

Hopefully you saved some from those chicken parm bites a couple posts ago ;).

Cut the skin away from the chicken sausage with a paring knife and place chunks of the sausage in a food processor. Add in the olive oil and kale. Take the bacon (cooked on the stovetop until crispy) and crumble two of the strips into the food processor. Pulse chop until the ingredients are combined into a ground beef consistency and the olive oil has coated the mixture.

Take the burger substrate and form into two ~1/3lb patties, i.e. allocate half of the mix per patty. Don't these already look good?


Bake for 15 minutes at 350F, to give them a nice golden brown crisp on the surface. Since the chicken is pre-cooked, no need to worry about doneness.

While the patties are in the oven, toast the corn english muffins (Thomas') and cut thin slices of the vidalia onion for topping the burger.

Assemble the burgers on the muffin buns, topping with an extra slice of bacon each, as well as the onion. A little ketchup or mustard never hurts either!


Although I had a hard time putting this down, I realized the blog could benefit from a more dramatic shot of the burger.


Just ignore the fact that it's half gone already.

Want a more bacon-filled experience? (Read: rhetorical). Substitute the olive oil for a tablespoon of bacon fat. Just spoon it right out of the pan you cooked the bacon in and into the food processor. No, not your mouth, the food processor!

Happy Memorial Day!

Saturday, May 17, 2014

Tangy Strawberry Mousse

Hi Everyone!

For Ron Burgandy, milk was a bad choice.

For the rest of us, it is an excellent one. Especially milk with lots of fat content.

Why you ask? Because when you whip it long enough, and mix in some fruit, it becomes a light and airy treat quite suitable for a spring afternoon. Huzzah!

Tantalize your tastebuds with this tangy strawberry mousse.


Ingredients
12 strawberries (tops removed)
Zest from one tangelo
4 tbsp light brown sugar
1 pint heavy cream
1 Chobani cherry greek yogurt (6 oz)

Time commitment: 10min
Estimated cost: 10$

This is basically an overglorified way to eat straight up whipped cream. But am I complaining? Absolutely not.

Use a food processor to combine the strawberries, brown sugar and zest into a loose puree. There can still be small chunks of strawberry floating around; this adds a little bit of texture to contrast the whipped cream.

In a blender (or with a hand mixer (or with a food processor (or with a whisk if you are super buff))) add the heavy whipping cream and process until it becomes solid. You have just created fresh whipped cream! Super easy right?


Quickly spoon the whipped cream into a bowl. Mix the Chobani yogurt (to resuspend the fruit on the bottom) and then fold the yogurt into the whipped cream with a spoon. Add in the strawberry mixture and stir until combined.

You'll want to serve this immediately after preparing it for best results, and keep it cold! Athough the yogurt helps to give the mousse some body, over time (i.e. the next day) the whipped in air will begin to slowly leave the cream, resulting in more of a delicious sludge than a delicious mousse.


Anyway, don't fear! You can always store the leftovers in the fridge and re-blend it later to fluff it up again, good as new. 

Or you can throw the leftover mousse in your ice cream maker... Muahahaha! (More on that this summer).

I served mine in this Irish coffee glass. Mainly to limit my portion size to something only mildly upsetting. This is, after all, about 70% whipped cream. Eat responsibly!


Happy crafting!

Thursday, May 8, 2014

No-Sew Fleece Blanket

Grandparents. Perhaps the hardest people on the planet to buy gifts for.

What gift can you get for someone who only ever asks for a phone call once in a while?

Well first of all you can call your grandparents, to alleviate that "I'm a terrible person" feeling.

Then you can give them a handmade gift, so that every time they use it they'll think of their favorite grandchild. Aww.

Maximize your love for g-ma with the no-sew fleece blanket.


Materials:
Two pieces of fleece, 7ft long x 5ft wide
Safety pins
A good pair of scissors

Time commitment: A couple episodes of Chopped
Estimated cost: Depends on the fleece; 40-80$

My mom is the one who showed me how to make these. Thanks Mom! Your mother's day card is in the mail.

Acquiring your fleece pieces is the first step here. Make a run to Joann's Fabrics; they have all of their rolls of fleece arranged by color and print. Just take the fleece rolls you like up to the nice fabrics employee and have them cut the lengths of fleece you desire.

Don't take your scissors into the store and try to cut the fleece yourself. This is generally frowned upon.

I ended up getting one "top fleece" with an interesting print on it, and one "bottom fleece" that is a solid color. But hey, if you really want a fire engine print on one side of the blanket and jungle animals on the other, go crazy.

Drive home. Then, lay the two fleeces on top of one another and align the edges as best you can. Pin them together about five inches inward from each corner and the same distance inward along the edges. Now measure off four inch squares at each corner of the fleece and cut them away with scissors.

This next part is going to sound tedious. That's because it is. Cut strips about one inch wide by four inches long (stretching into the core of the blanket) using a your scissors. To aid you in cutting a consistent length, you can draw a straight line from corner to corner in pencil and cut to that line each time.

After you've destroyed your hand cutting all of those strips, you have now arrived at the "fun part". Take the top strip and complimentary bottom strip and tie them together. Repeat ad nauseam. Two overhand knots per set of strips works best. Just be sure to tie them all in the same direction to keep all the strips of the same color facing in the same direction. If your knots start to bunch up along an edge, firmly pull them apart (fleece is fairly stretchy).

Finally, remove the safety pins. You don't want Grandma rolling around on those!


What can I say? Grandma said she wanted color. At least she won't lose it!

The blanket I made for myself is a little bit more subdued. And also a little bit more Canadian.


Until next time!

Thursday, May 1, 2014

Broccoli Slaw

From the sum total of my last few food posts, you might think I subsist on a diet consisting purely of sugar and fat.

And sugar.

But believe it or not I do eat stuff that resides lower down on the food pyramid.

Take for example this delicious broccoli slaw!


Ingredients:
1 head of broccoli, raw
1 tbsp light mayo
1 tbsp horseradish mustard
1 tbsp extra light olive oil (tasting oil)
1/3 bag of salad (a mix with cabbage and carrot slices is preferable)
Salt and pepper (to taste)

Time commitment: veggie time!
Cost: about 6$

I always find restaurant and pre-made coleslaw to be bogged down in mayo. Not so with this broccoli slaw! Nice and hearty dark greens with a kick, and just enough mayo to remind you that you're not vegan.

If you are vegan, please don't include the mayo when you make this. I don't want the vegan police to come a-knockin'.

Cut the head of broccoli into florets. Then combine all of the ingredients in a food processor and pulse chop until the broccoli is a manageable size and the ingredients are thoroughly combined.

Voila! You just made a dish with vegetables in it! I'm so proud of you!

(I'm mostly speaking to myself there, but I'm proud of you too).


See Mom? I actually made it. Use it as a garnish, side dish, or entree. So versatile!


If you dislike veggies, tucking the slaw inside of a pita definitely helps. Or you could just not make this recipe. At least I tried?


Saturday, April 26, 2014

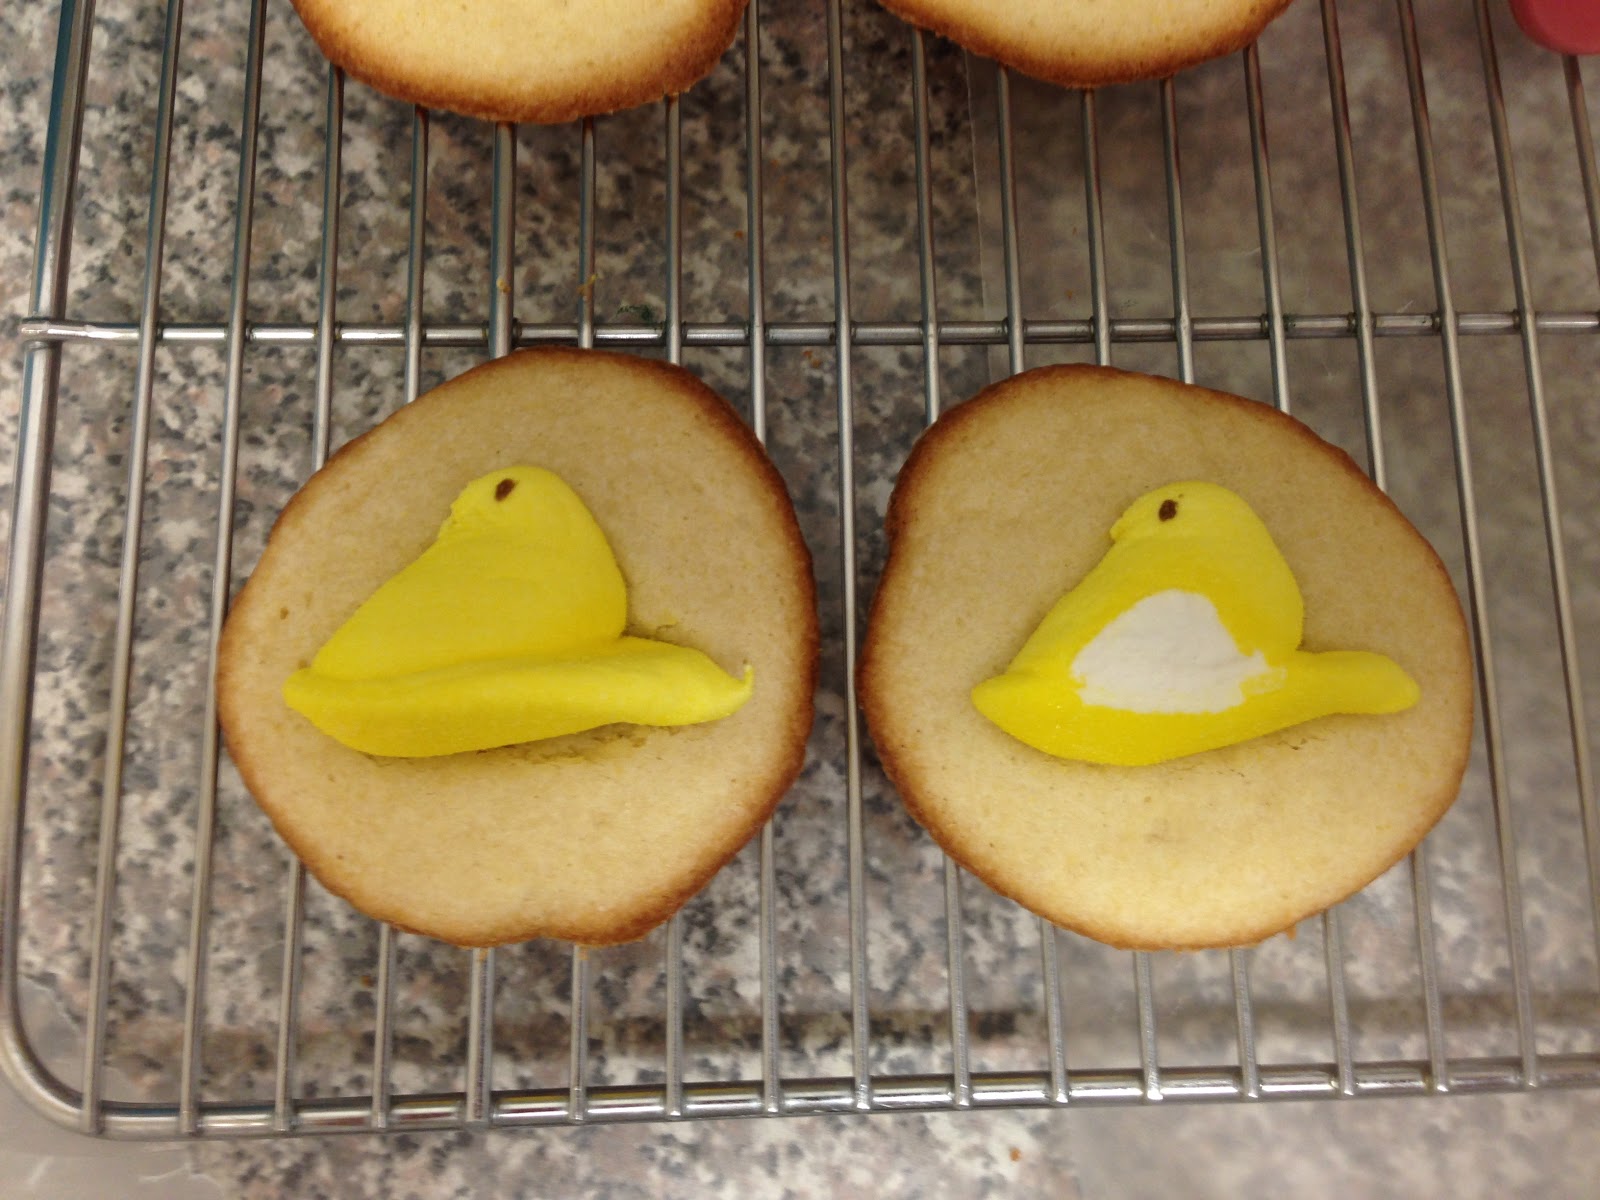
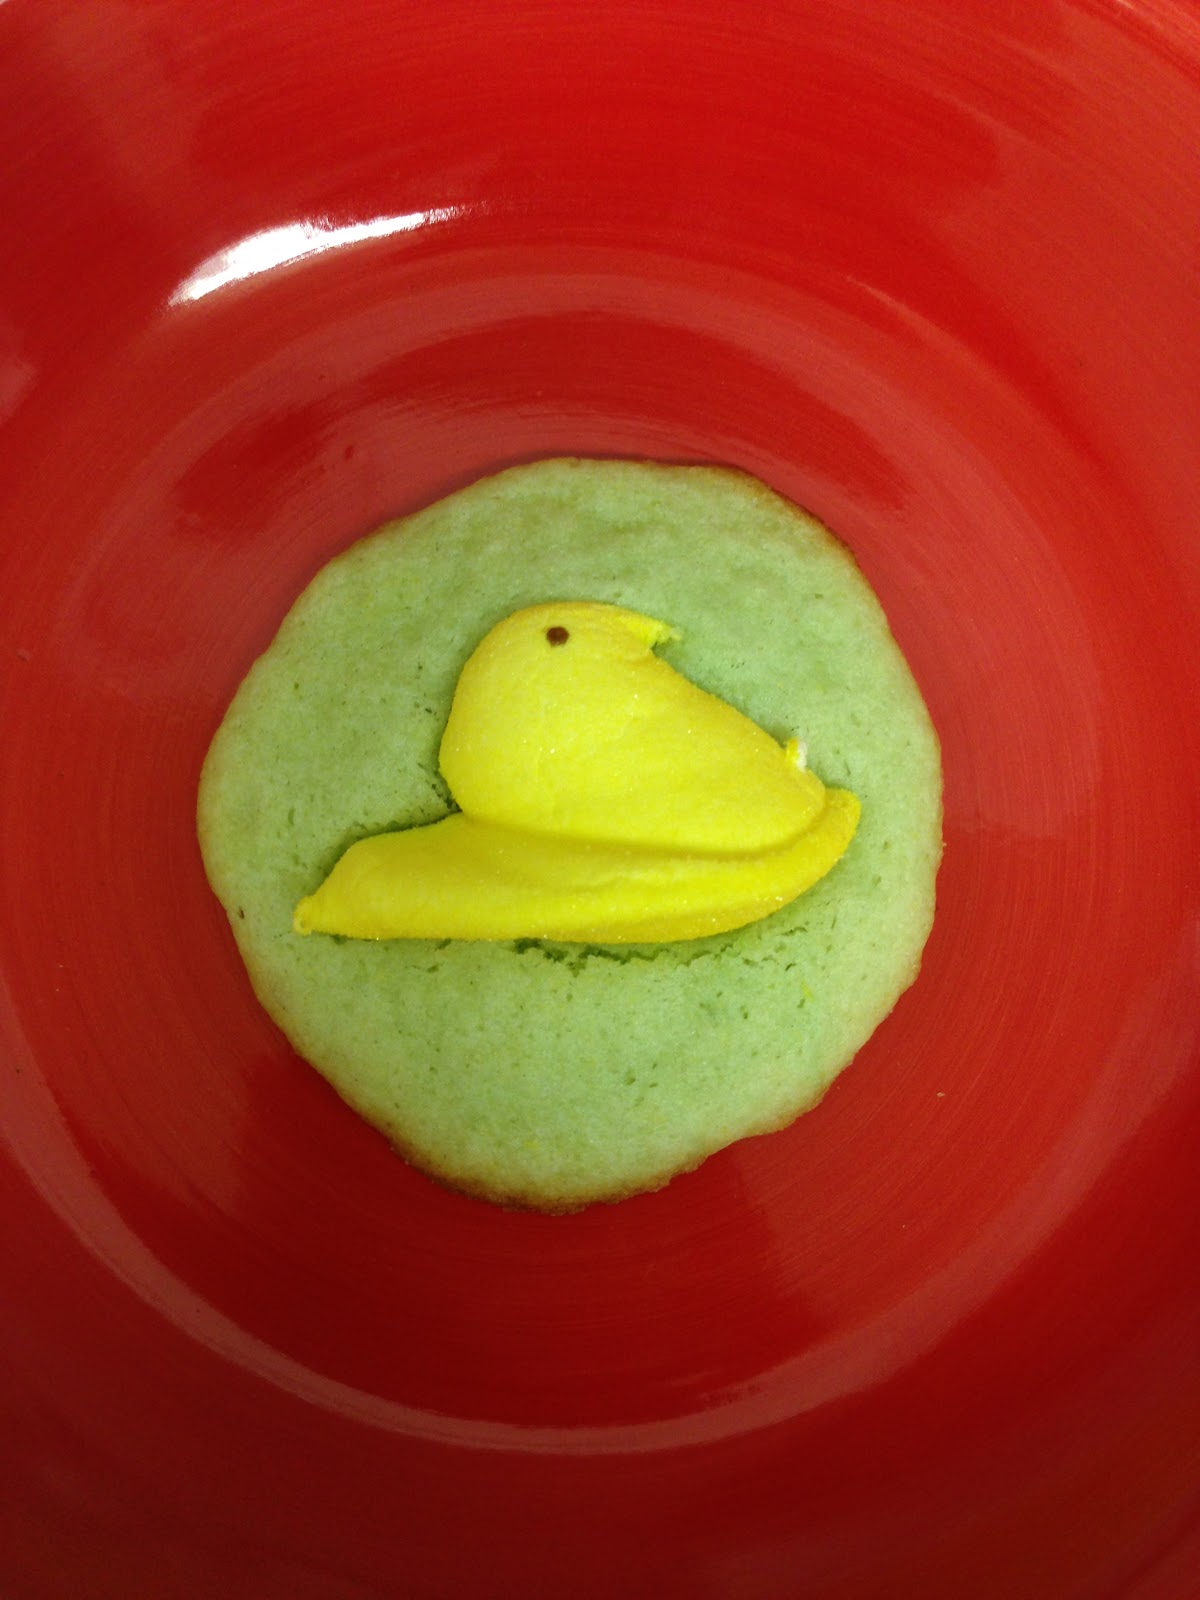
"Spring Chicken" Cookies


Ah... Spring is in the air.

Even in New York, the weather is reaching the mid 60's this weekend. Let us rejoice!
Hopefully you're reading this blog on your phone while doing yogalates in Central Park (or something analogous to that).

Perhaps the most hateful expression related to Spring that I know of is "I'm no spring chicken". People always say this with such disdain. Sure, spring chickens might be naive. Maybe they were even born yesterday. But I'm sure they are perfectly friendly little birds that deserve some love.

Help me celebrate the joys of Spring and its chickens with these aptly named spring chicken cookies.


Ingredients
1 cup vegetable oil
1 cup granulated sugar
2 eggs
1 tsp mint extract
4 tbsp lemon juice
2 1/4 cups all-purpose flour
1/2 tsp baking soda
1 tsp salt
Peeps!! (You choose the color)
Green food coloring (optional)


Yield: roughly two dozen
Estimated cost: about 12$ per batch
Time commitment: 30 mins

I know what you're thinking. Yes, you can eat some of the Peeps now.

Nothing says "Spring" like a fresh package of Peeps - the marshmallowy treat that makes you feel all warm and gooey and sick inside. Say "Spring!!" louder and prouder by placing them atop delicious sugar cookies.

Whisk the sugar, oil, mint extract and lemon juice together in a large bowl until it comes together. Crack the eggs into the bowl and combine thoroughly. In a separate bowl mix together the flour, salt and baking soda. Then, fold the flour mix into the wet ingredients, about 1/3 of the volume at a time. Fold with a spatula and avoid over mixing for softer cookies.


Place 1 inch blobs of dough onto a cookie sheet lined with greased tin foil. Bake the dough for 10 minutes at 350F.

While the cookies are in the oven you might be asking "what should I do with the few Peeps I haven't already consumed"? Get out a cutting board, channel your inner serial killer and chop those bad boys in half, either lengthwise or separating the head from the tail.


First, I tried baking the cookies with the Peeps already on top.


Hey, I'm not perfect. Tasty for the mouth, but not for the eyes. Ironically, they melted to look like fried eggs.

Here's a better idea:

After 10 minutes of baking, remove the cookies from the oven and immediately lay the slaughtered Peeps flat on top of each cookie. Press the Peep lightly into the dough. Leave the cookies to cool on the sheet for at least two minutes before moving them to a wire rack. The Peeps will fuse with the dough during the cooling process.


Want to get really fancy? Add a bit of green food coloring to your batter (maybe 4 drops) before baking to make those mallow chicks really pop.


While not legally allowed to say so, I like to think of these cookies as "reduced calorie" since I only used half a Peep per cookie. (This last sentence can also be found under the definition of wishful thinking).

If you want to have a truly low-cal cookie experience, I recommend just looking at the cookies instead of eating them.


Happy Spring Everyone!

Sunday, April 20, 2014

Dyed Easter Eggs

Happy Easter everyone!


Getting tired of trying to search for those hidden Easter eggs? Then it's the perfect time to read this blog!

My recommendation: let the little kids find all the eggs and then just steal as many as you want from them.

My actual recommendation: forget the hidden eggs and dye some of your own!


Materials:
Eggs (white eggs, without farm stamps on them!)
Food coloring (gel or liquid)
Vinegar (white wine or apple cider)
Wire (a coat hanger will do nicely)
Solo cups (whatever you have leftover from Saturday night, beer removed)

Time commitment: about an hour
Estimated cost: quality time with your family in the other room

How do you like me now, Easter Bunny (rhetorical)?

Who's your daddy, Easter Bunny (somewhat rhetorical)?

Hard boil the eggs by gently placing them in a pot of warm water. Bring the water to a boil and then reduce to medium heat. Continue to cook for ten minutes. Carefully remove the eggs from the water with tongs and allow them to cool completely on a cutting board.

Prepare the egg dyes by adding a teaspoon or two of food coloring to a cup of warm water, plus a tablespoon of white wine or apple cider vinegar. Use more food coloring to get a darker color on your eggs.

To make clean-up a breeze, I cut solo cups in half and used the bottoms as individual dying troughs. (Trust me, you're not going to be playing beer pong on Easter Sunday anyway).


While the eggs are cooling, you can make wire egg holders that you can use to dip your eggs in different colors. Just twist an old coat hanger or spare wire into whatever shape you think is best.


Dip eggs for 30 seconds or longer into the desired color, with increased time leading to a darker hue. Between colors, rest eggs on wax paper or egg holders to let the coloring dry. Dab excess dye off the egg with a paper towel, being careful not to smear the dye.

Remember those solo cup tops your threw away about five minutes ago? Dig them out of the recycling. If you cut off the very top of the cup (the hard rim) you can bend the plastic into nice egg holders. Apply duct tape liberally.


Be creative! Dye eggs in layers, at different angles. Mix prepared colors to generate new colors. If you're really getting into it, you can even use a paintbrush for a more delicate approach. Just make sure to have fun!


This is what J and I were able to come up with. Not too shabby!


Once you have completed your masterpieces, keep them in the fridge until you wish to display them.

While the eggs are on display, make sure to brag about how awesome you are to friends and family. If you wanted to plug this blog while you're at it, I wouldn't complain!

Have a great holiday!

Tuesday, April 15, 2014

Handmade Gourmet Chocolates

It's rich, dark, smooth, and just the right amount of sweet.

No, it's not me. It's actually dark chocolate. But your flattery has been duly noted ;).

Not many foods are better than chocolate. What do I mean by "better"? I mean greater than in awesomeness. Don't over think it. Your tongue knows what I'm talking about.

Take your chocolate game to the next level, and make your own at home!


1 cup of high quality dark chocolate pieces
Double boiler
Silicone chocolate mold (or silicone ice cube tray!)
Ingredients for making the chocolates fancy (see end notes)

Time commitment: Does it matter?? (40min)
Estimate cost: Who cares it's chocolate!! (7-15$)

I suppose saying "make your own" is a bit of a lie, because we're really just re-molding pre-made chocolate and inserting what we like in the middle. I mean I have free time, but not that much free time. Maybe "re-purpose your own" is more accurate.

Forming these gourmet chocolates is analogous to smelting a sword. We'll heat up the material to liquefy it, pour it into a mold, and then insert what we like into it before it cools. 

Make chocolate, not war. 

By which I mean to say re-purpose chocolate, not war.

First, we'll need a double boiler. This contraption consists of one pot resting above boiling water inside another larger pot below (shown in the cartoon). The idea here is that the upper pot is heated by the boiling water vapor (steam) and not by the stove top, and thus will never reach a temperature hotter than the boiling point of water (i.e. 100C, or 212F for non-scientists) no matter how high the heat is set on the stove. This is critical to avoid burning the chocolate while you melt it.

Sure, you could buy a double boiler on Amazon. Or you could do what I did and set a saucier on top of a traditional sauce pot filled with about one inch of water set to boil. Save the extra cash to spend on more chocolate!


The best chocolate for this food craft is high quality dark chocolate, such as Ghriradelli, Lindt or Scharffen berger with greater than 60% cocoa content. Chocolate bars, chunks or chips will work fine. Avoid Nestle and Hershey chocolates if possible; in a pinch they're fine, but the resulting sludge is very viscous and gritty. I know this because I mixed some into the first batch (data not shown)!

Place about a cup of chocolate bits into the top of the double boiler and melt into a smooth liquid, stirring occasionally with a wooden spoon. Ladle the liquid into the chocolate mold, filling it about halfway up. Then insert the fancy ingredient of your choice (see below). After inserting your filling of choice, cover to the top of the mold with chocolate.


Once all of the chocolates have been constructed, place the mold in the refrigerator for 30 minutes. After this time, gently invert the mold onto wax paper to procure your delicious looking chocolates. Remove the extra chocolate fringe leftover from the mold before serving.

Finally, pat yourself on the back. I'm sure you did a great job!


If you broke some of the chocolates in removing them from the mold, eat them quickly to destroy the evidence.


I broke that one for dramatic effect, I swear!

A few suggestions about crafting your dream chocolates:

(1) Want the top of your chocolate to be coated in your ingredient? Add the ingredient first, then fill all the way with chocolate. This works best with powdered ingredients (cinnamon, cocoa, powdered sugar), as well as salt, finely chopped nuts, etc.

(2) You can layer in other sticky or viscous liquid ingredients between chocolate layers, such as peanut butter, fondant, maple syrup or other types of chocolate (white or milk). If your ingredient is more dense than the liquid chocolate (i.e. it sinks to the bottom), cool the first chocolate layer in the mold, add your layer, and then top with more liquefied chocolate before cooling a second time.

(3) Ingredients that will melt (bacon fat!) can be mixed into the melted chocolate before pouring. Just remember that ingredients with too much moisture (even honey) will cause the chocolate to seize (become hard) if mixed in. Moist ingredients are best left as fillings.

(4) The crazier the ingredient sounds, the better!

I'm sure I'll have a part two of this craft in the future. Stay tuned!