Showing posts with label holiday. Show all posts

Wednesday, December 24, 2014

Recycled Holiday Cheer


Happy Holidays Everyone!

Many of you, like me, are probably at home during this time of the year. 

Time with family is great, don't get me wrong! I like playing cribbage and electronic Battleship as much as the next guy.

But after the first couple of days of being surrounded by loved ones, that creeping feeling sinks back in...

...Must...craft...something...

So like Gollum to the Ring, I'm back, baby!

Why not spread some extra holiday cheer with these eco-friendly projects from "up-cycled" materials?


Materials:
1 string of small LED Christmas lights, 50ct (classic white shown here)
1 cardboard shirt box
Hot glue gun

Estimated cost: Practically free (~4$ for lights)
Time commitment: The time it takes to wrap 10 presents
Carbon footprint: I have no idea how to calculate this

Just to clarify the title of this post, it's the material that is recycled. Not the holiday cheer. That should be genuine.

First, breakdown your cardboard shirt box (you know, one of those boxes that they use to wrap up clothing from Macy's, etc. for the holidays). Use binder clips to hold the top, bottom and sides of the shirt box in place on top of one another, like so.


Now, trace out a festive holiday or wintry shape on top of the cardboard. An idyllic gingerbread house? Santa in his sleigh? I went with an old classic: a Christmas tree. Not only for its easy to recognize shape, but for the cyclic nature of re-making a tree out of a processed tree product. From whence you came, grand fir!

Once you've got your shape traced out, go to town with scissors or a box cutter. Just try to keep those side leaflets where the binder clips are intact! When you're done, you should have two identical cardboard Christmas tree cut-outs.


Next, cut the long leaflets of the box away from the remains of the box center where you cut out your traced shape. Fold each long leaflet into itself from the top and bottom, longways, so that you have bent strips of cardboard.

Now take one of the strips and cut pieces off to match the length of each bough of your tree. Using a hot glue gun, affix the bottom bent edge of the strip piece to one face of your tree. Repeat this process along each downward slant of each branch on your tree, using a new strip piece per branch. Leaving space between these cardboard framing pieces will allow light to shine down your tree with majestic glory.


Finish framing your tree by having a long strip piece go across the bottom of the tree. 


Cut a large "X" into the middle of this long framing piece; the use for this cut will become apparent in a bit. (Hint: This framed out area will eventually serve as the holding area for your Christmas lights).


Make the trunk of your tree stand on its own (or, at the very least, with limited assistance) by taking another side leaflet and folding it into a "U" shape. Hot glue the ends above and underneath the long framing piece at the base of your tree, and bend the U-shaped cardboard as needed.


Now, take your LED Christmas lights and stuff them into your Christmas tree frame. Try to have a lot of the actual lights along the edges of the frame, with a few interspersed in the middle of the tree. Take the pronged plug of the light string and press it through that "X" cut you made in the long framing piece. 


I should also note at this point that it would behoove you to use LED lights here, since they don't heat up when operated. Although a burning bush is great for religious symbolism, it is less great to wake up on Christmas morning and see one in your own home.

Finally, decorate the front cut out of your Christmas tree as you see fit. I would recommend poking holes into the front at random intervals with a ballpoint pen ("ornaments") so that light can shine through. You can also take scraps from your shirt box and use it as trim or fake snow on the tree. If I'd had green cellophane, I might have used that too. But I didn't.


Hot glue your front cut-out onto the top of the Christmas tree frame and press into place. Plug your Christmas tree into an extension cord and behold! You now have a festive holiday decoration that doubles as a nightlight! Stick that in your sleigh and fly it.


You could also give this as a gift if you were desperate. Just throwing it out there.

If you're tired and you don't want to read anymore, you can stop here. I won't mind. Seriously, I won't.

But before you go, just ask yourself: what would Santa do?

You and I both know that that extremely jolly fellow would persevere.

Grab another cardboard box and a double espresso. It's time to make some interactive Christmas cards.


Materials:
One cardboard shirt box
Colored card stock
Staples
Tape
Warm sentiments and wishes, to be written down

Estimated cost: Again, practically free
Time commitment: More than is probably necessary

Cut a large strip out the cardboard box about 5 inches wide. Cut the strip to about 15 inches long and then fold it into three equal parts, lengthwise. In the middle section of the strip, use a box cutter to cut out another festive scene, removing the small pieces as you go. Try to keep the design localized to the middle of this section, and leave some cardboard uncut at the top and bottom. If it wasn't already obvious, I like Christmas trees.


Take card stock of assorted colors and cut them into an interesting pattern of your choosing. Overlay the different pieces and tape them together on the back with scotch tape. Just make sure your card stock pieces cover your entire design from the front, including extra card stock above and below the design.


Cut out a new piece of cardboard about 2"x7". Remove rectangular pieces from the upper right and lower right corners of this cardboard strip, about 1.5"x2". If this is confusing, hopefully the cartoon and the picture will help! Next, staple your taped card stock to the new cardboard strip along one edge. Keep those staples out of sight on the front of the card!

Position your taped and stapled card stock / cardboard monstrosity above the middle section of your card, with the front of the card facing down. Fold the left panel of the card over the card stock. Use a pen to mark off there the little pull tabs fall on the top and bottom of this folded panel. Unfold and cut two sets of 1/2 inch slits about 1/4 inch apart (vertically) at these locations. Fold this panel back over and thread each pull tab through each set of slits as shown.


Tape the folded panel to the inside of the front panel along its edge. Write something relatively nice on a small piece of card stock and affix it to the panel you haven't touched yet. Don't forget to sign the card after all of this work!

Flip the card over and enjoy countless hours of entertainment! Pull the pull tabs up and down to change the pattern underneath your card design.


Oooohhh...


Aaaahhh...

Just be gentle with those tabs. This is one card you definitely won't want to make a second time.

Happy Holidays, and Happy Crafting!

Thursday, November 27, 2014

Malbec Cranberry Sauce

Oh wow! It's already Thanksgiving!

...And I have made nothing. Fail.

Time to whip something together for tonight's dinner with my girlfriend's family! They'll never know that you and I made this last minute (unless they read this).

What's good in a pinch? Cranberries and wine. The definition of synergy.


Ingredients:
5+1c fresh cranberries
1/2c water
1c sugar
1 cinnamon stick
1tsp anise seed

Making this sauce should only take about 30 minutes, so you'll have plenty of time to travel (and swear at people driving 25 on the freeway), watch the 49ers crush the Seahawks, take a nap, etc.


Add 5 cups of cranberries to a medium sauce pot along with the sugar, wine, water and spices. Cover and cook on low for 10 minutes, stirring occasionally. Then, remove the saucepan's lid and cook over medium heat for about 15 minutes, stirring frequently. At this point the cranberries should bursting open, releasing their starch and naturally thickening the sauce. After the sauce thickens, add in the remaining cup of cranberries (for textural intrigue) and cook for an additional five minutes. Fish out the cinnamon stick and store the sauce in the fridge after it cools off.


Now you have a wonderful sauce suitable for any wintertime meal! And you also have an entire bottle of leftover Malbec. For those awkward yet lovely family moments. #SloppyThanksgiving #butdrinkresponsibly.

Before I stop talking and let you guys frantically make sauce, I just want you to take a brief moment and let someone know that you're thankful for them. My sister texted me this this morning, and it 100% made my day. No matter who you are, there's always someone to be thankful for!

Happy Thanksgiving everyone! And Happy Crafting!


Sunday, May 25, 2014

BLT Chicken Burger


Ahh Memorial Day. The first long weekend of the outdoor season. Time to throw on your stunna' shades, crack open a cold one and fire up the grill.  

This presents a problem for people like me who don't have any outdoor space. Sure I could fight for the use of a coal pit at the local park.  But based on where I live, this sort of altercation would likely result in me getting knifed.

I don't want to be a statistic. I just want a nice, post-modern burger. 

That's why I played it safe this Memorial Day and baked my burger in the oven. Short on grill marks, big on chickeny goodness. 

Enjoy an altercation-free holiday with this upscale BLT chicken burger!


Ingredients:
2 sundried tomato chicken sausages (Al Fresco; it's pre-cooked!)
1/2 cup frozen kale
4 strips of bacon, cooked (crispy!)
1 tbsp extra light olive oil
1/2 vidalia onion
2 corn english muffins

Serves 2, or 1 super hungry person
Time commitment: 30mins
Estimated cost: 12$

I know, I know. Chicken sausage? Again?? Just trust me, okay? Have I steered you wrong so far? (Read: rhetorical).

Hopefully you saved some from those chicken parm bites a couple posts ago ;).

Cut the skin away from the chicken sausage with a paring knife and place chunks of the sausage in a food processor. Add in the olive oil and kale. Take the bacon (cooked on the stovetop until crispy) and crumble two of the strips into the food processor. Pulse chop until the ingredients are combined into a ground beef consistency and the olive oil has coated the mixture.

Take the burger substrate and form into two ~1/3lb patties, i.e. allocate half of the mix per patty. Don't these already look good?


Bake for 15 minutes at 350F, to give them a nice golden brown crisp on the surface. Since the chicken is pre-cooked, no need to worry about doneness.

While the patties are in the oven, toast the corn english muffins (Thomas') and cut thin slices of the vidalia onion for topping the burger.

Assemble the burgers on the muffin buns, topping with an extra slice of bacon each, as well as the onion. A little ketchup or mustard never hurts either!


Although I had a hard time putting this down, I realized the blog could benefit from a more dramatic shot of the burger.


Just ignore the fact that it's half gone already.

Want a more bacon-filled experience? (Read: rhetorical). Substitute the olive oil for a tablespoon of bacon fat. Just spoon it right out of the pan you cooked the bacon in and into the food processor. No, not your mouth, the food processor!

Happy Memorial Day!

Saturday, April 26, 2014

"Spring Chicken" Cookies


Ah... Spring is in the air.

Even in New York, the weather is reaching the mid 60's this weekend. Let us rejoice!
Hopefully you're reading this blog on your phone while doing yogalates in Central Park (or something analogous to that).

Perhaps the most hateful expression related to Spring that I know of is "I'm no spring chicken". People always say this with such disdain. Sure, spring chickens might be naive. Maybe they were even born yesterday. But I'm sure they are perfectly friendly little birds that deserve some love.

Help me celebrate the joys of Spring and its chickens with these aptly named spring chicken cookies.


Ingredients
1 cup vegetable oil
1 cup granulated sugar
2 eggs
1 tsp mint extract
4 tbsp lemon juice
2 1/4 cups all-purpose flour
1/2 tsp baking soda
1 tsp salt
Peeps!! (You choose the color)
Green food coloring (optional)


Yield: roughly two dozen
Estimated cost: about 12$ per batch
Time commitment: 30 mins

I know what you're thinking. Yes, you can eat some of the Peeps now.

Nothing says "Spring" like a fresh package of Peeps - the marshmallowy treat that makes you feel all warm and gooey and sick inside. Say "Spring!!" louder and prouder by placing them atop delicious sugar cookies.

Whisk the sugar, oil, mint extract and lemon juice together in a large bowl until it comes together. Crack the eggs into the bowl and combine thoroughly. In a separate bowl mix together the flour, salt and baking soda. Then, fold the flour mix into the wet ingredients, about 1/3 of the volume at a time. Fold with a spatula and avoid over mixing for softer cookies.


Place 1 inch blobs of dough onto a cookie sheet lined with greased tin foil. Bake the dough for 10 minutes at 350F.

While the cookies are in the oven you might be asking "what should I do with the few Peeps I haven't already consumed"? Get out a cutting board, channel your inner serial killer and chop those bad boys in half, either lengthwise or separating the head from the tail.


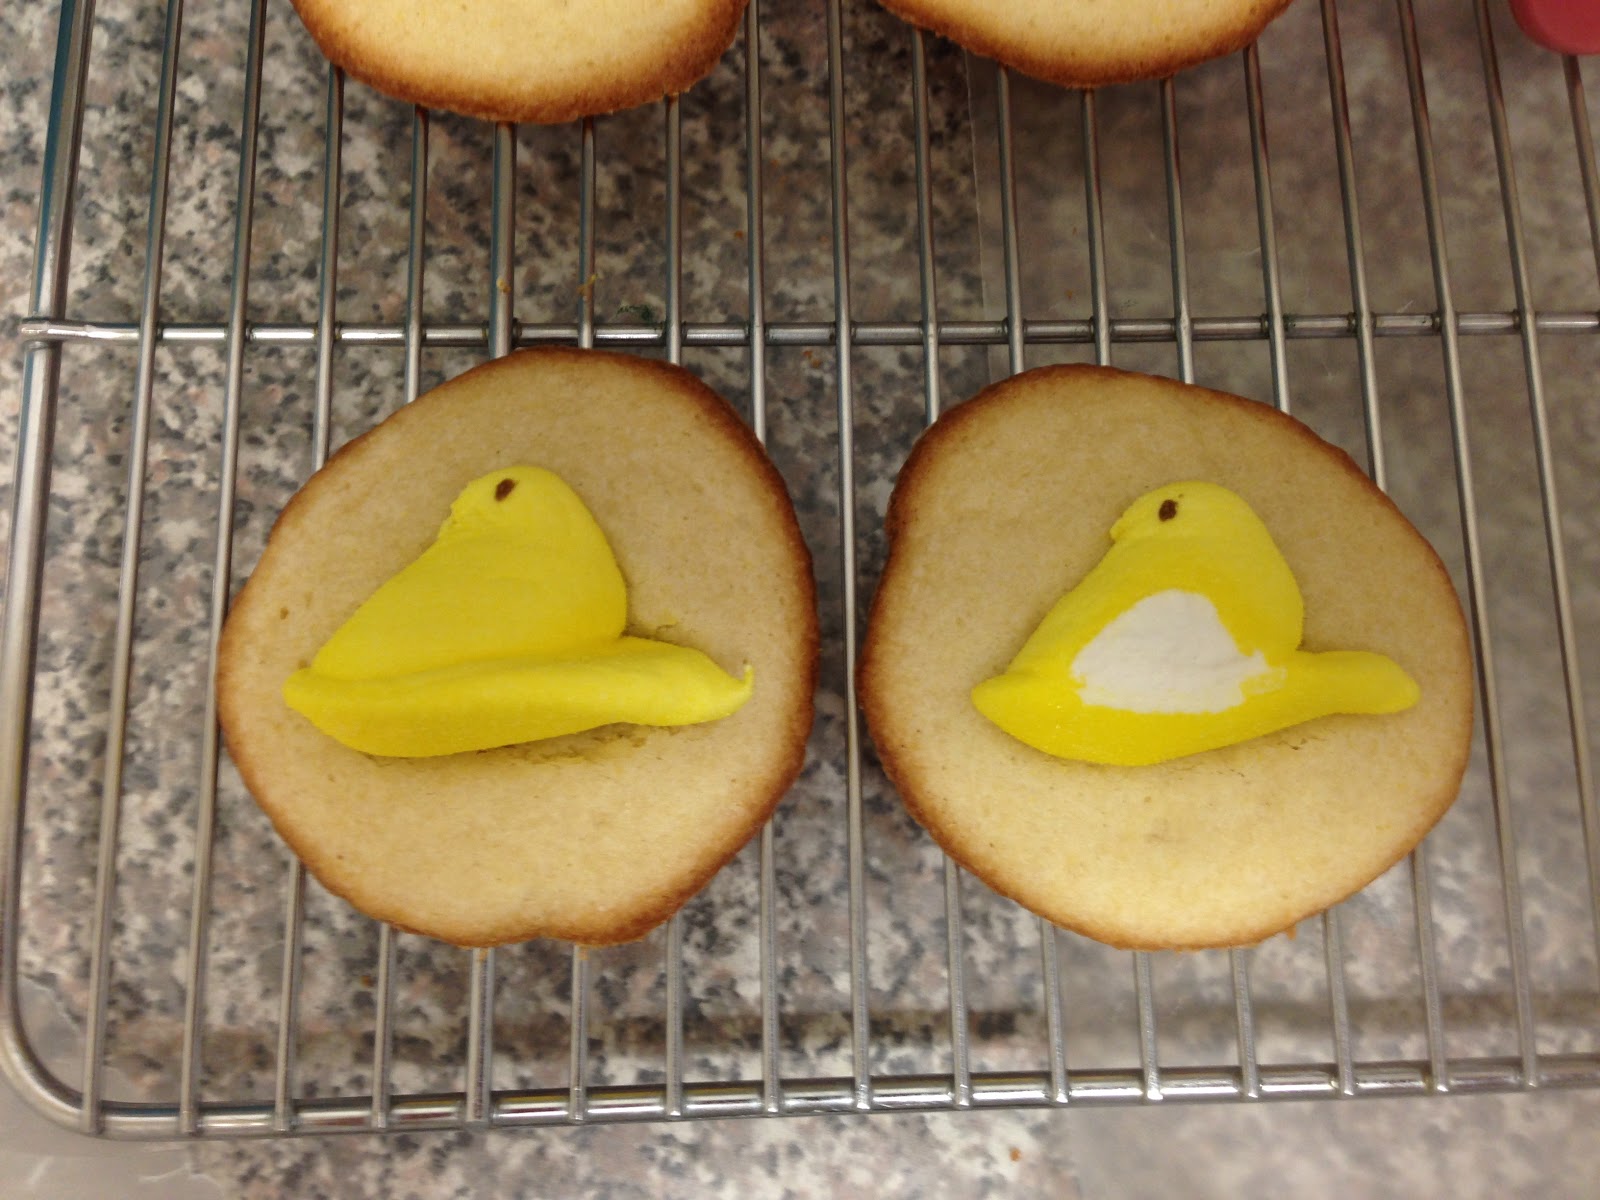
First, I tried baking the cookies with the Peeps already on top.


Hey, I'm not perfect. Tasty for the mouth, but not for the eyes. Ironically, they melted to look like fried eggs.

Here's a better idea:

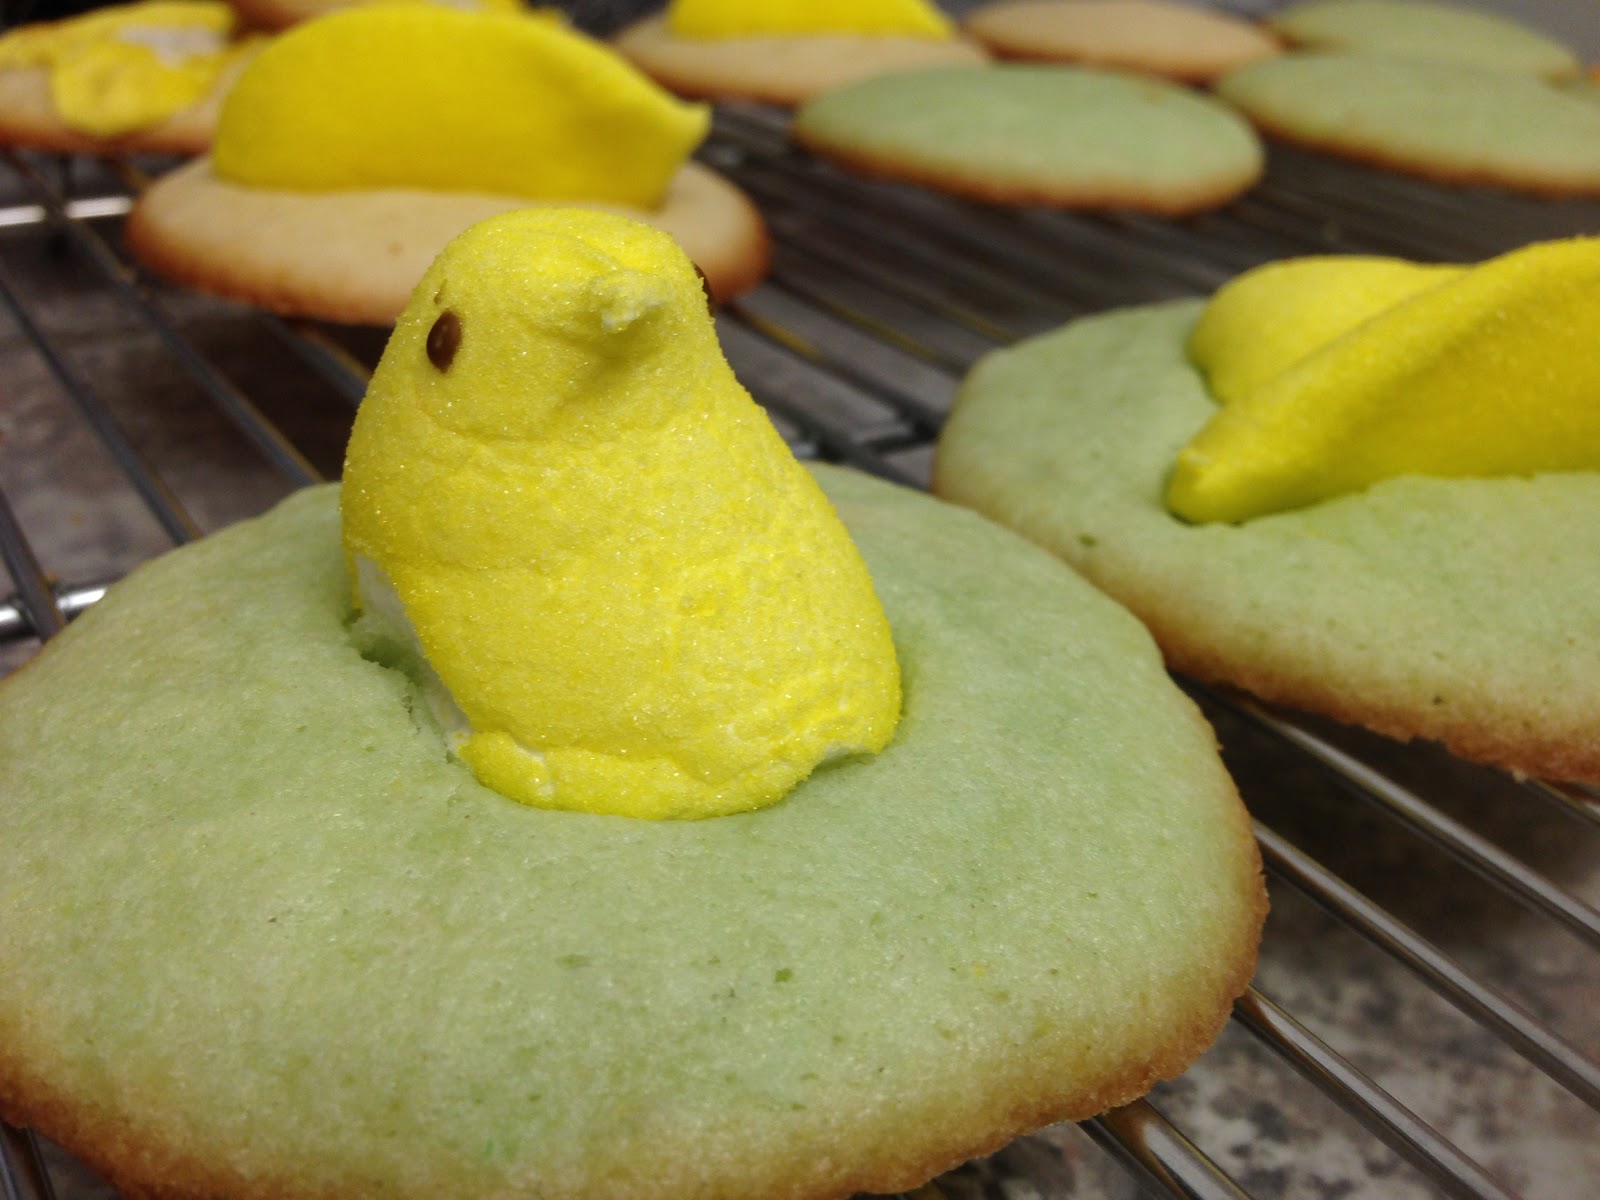
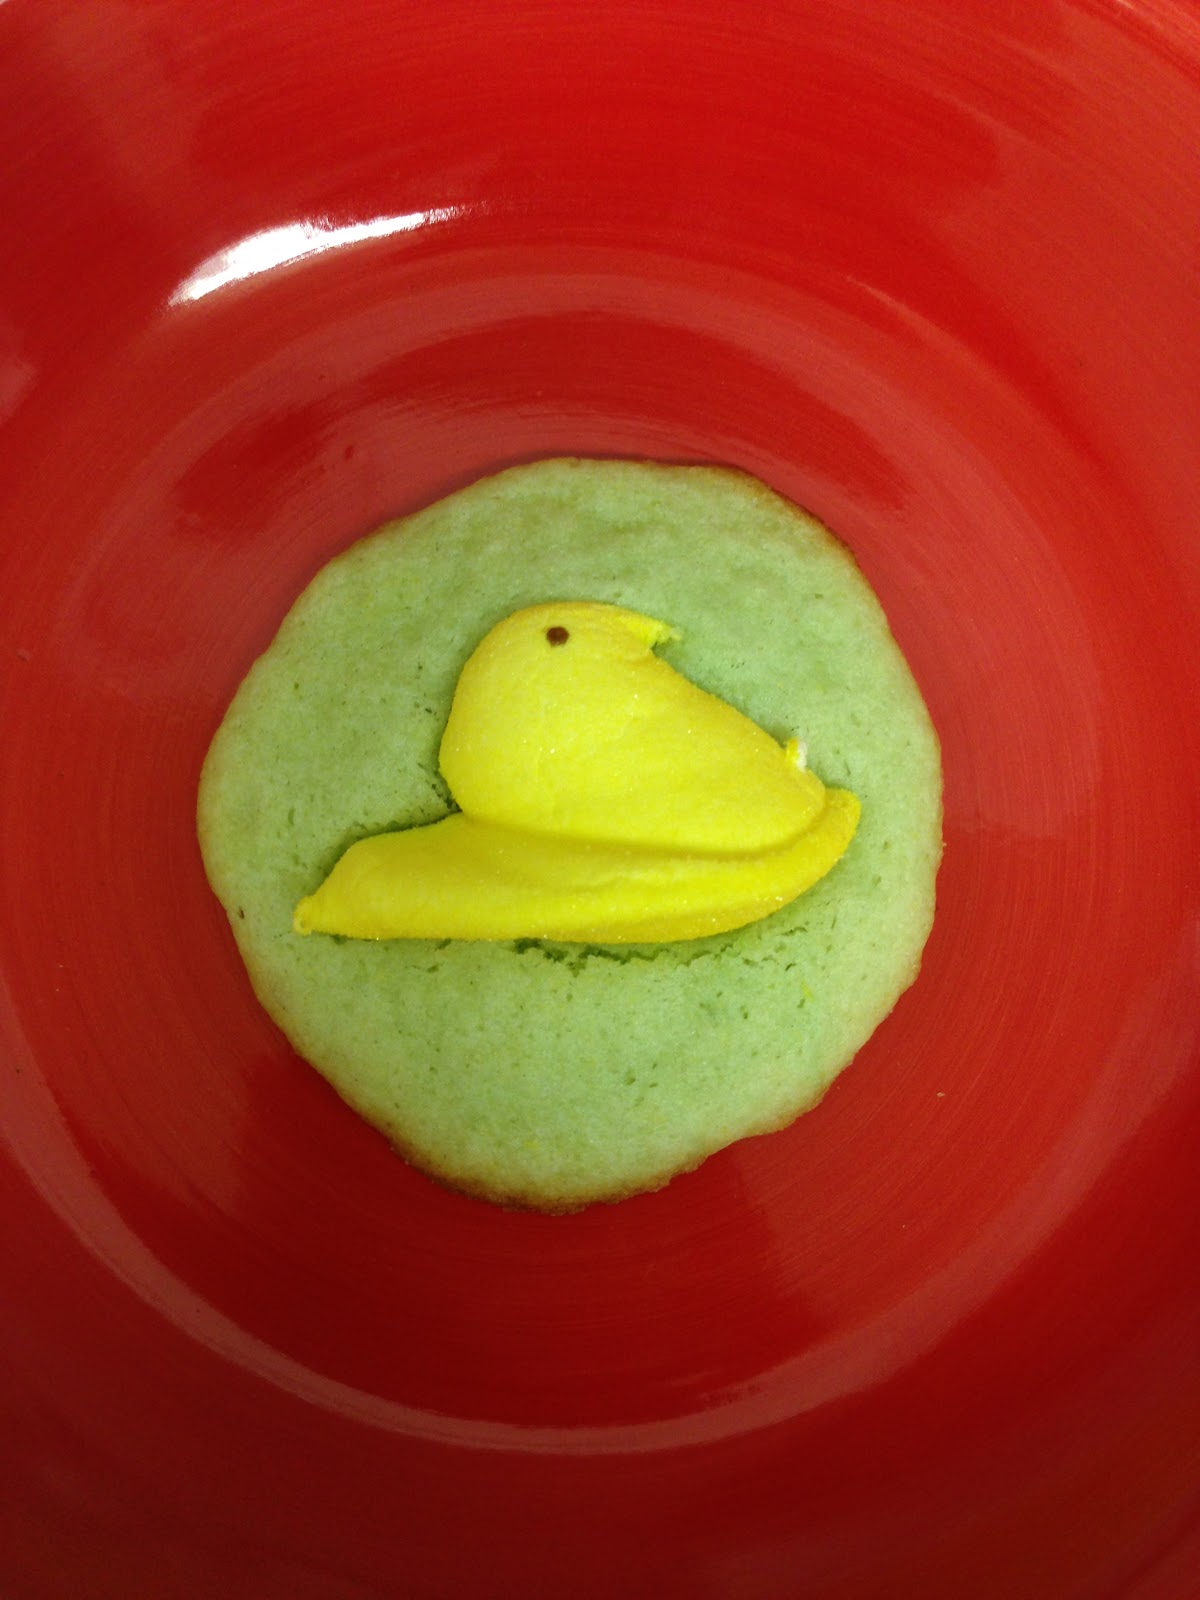
After 10 minutes of baking, remove the cookies from the oven and immediately lay the slaughtered Peeps flat on top of each cookie. Press the Peep lightly into the dough. Leave the cookies to cool on the sheet for at least two minutes before moving them to a wire rack. The Peeps will fuse with the dough during the cooling process.


Want to get really fancy? Add a bit of green food coloring to your batter (maybe 4 drops) before baking to make those mallow chicks really pop.


While not legally allowed to say so, I like to think of these cookies as "reduced calorie" since I only used half a Peep per cookie. (This last sentence can also be found under the definition of wishful thinking).

If you want to have a truly low-cal cookie experience, I recommend just looking at the cookies instead of eating them.


Happy Spring Everyone!

Sunday, April 20, 2014

Dyed Easter Eggs

Happy Easter everyone!


Getting tired of trying to search for those hidden Easter eggs? Then it's the perfect time to read this blog!

My recommendation: let the little kids find all the eggs and then just steal as many as you want from them.

My actual recommendation: forget the hidden eggs and dye some of your own!


Materials:
Eggs (white eggs, without farm stamps on them!)
Food coloring (gel or liquid)
Vinegar (white wine or apple cider)
Wire (a coat hanger will do nicely)
Solo cups (whatever you have leftover from Saturday night, beer removed)

Time commitment: about an hour
Estimated cost: quality time with your family in the other room

How do you like me now, Easter Bunny (rhetorical)?

Who's your daddy, Easter Bunny (somewhat rhetorical)?

Hard boil the eggs by gently placing them in a pot of warm water. Bring the water to a boil and then reduce to medium heat. Continue to cook for ten minutes. Carefully remove the eggs from the water with tongs and allow them to cool completely on a cutting board.

Prepare the egg dyes by adding a teaspoon or two of food coloring to a cup of warm water, plus a tablespoon of white wine or apple cider vinegar. Use more food coloring to get a darker color on your eggs.

To make clean-up a breeze, I cut solo cups in half and used the bottoms as individual dying troughs. (Trust me, you're not going to be playing beer pong on Easter Sunday anyway).


While the eggs are cooling, you can make wire egg holders that you can use to dip your eggs in different colors. Just twist an old coat hanger or spare wire into whatever shape you think is best.


Dip eggs for 30 seconds or longer into the desired color, with increased time leading to a darker hue. Between colors, rest eggs on wax paper or egg holders to let the coloring dry. Dab excess dye off the egg with a paper towel, being careful not to smear the dye.

Remember those solo cup tops your threw away about five minutes ago? Dig them out of the recycling. If you cut off the very top of the cup (the hard rim) you can bend the plastic into nice egg holders. Apply duct tape liberally.


Be creative! Dye eggs in layers, at different angles. Mix prepared colors to generate new colors. If you're really getting into it, you can even use a paintbrush for a more delicate approach. Just make sure to have fun!


This is what J and I were able to come up with. Not too shabby!


Once you have completed your masterpieces, keep them in the fridge until you wish to display them.

While the eggs are on display, make sure to brag about how awesome you are to friends and family. If you wanted to plug this blog while you're at it, I wouldn't complain!

Have a great holiday!