Showing posts with label baking. Show all posts

Thursday, November 6, 2014

Mini Cherry Pies

Cherry pie. Almost as American as apple pie.

Just the word "pie" conjures up an image of a warm, buttery pie sitting on a window sill to cool while a light breeze wafts the aroma about the house (or apartment).

Maybe historically this was the best way to cool down pastries, but I have to wonder how many smashed pies resulted from teetering off of unstable window sills across this great nation. Gravity can be a real witch sometimes.

It was late summer this year, and at work we were having a bake sale to benefit the homeless in Westchester County. You would think that one of the top 10 richest counties in the U.S. wouldn't have such a big homeless problem... but you'd be wrong!

I decided to make cherry pie for my contribution, even though pie itself is kind of awkward to dole out at a bake sale. The best ones are obviously gooey and spill their contents everywhere as soon as you remove a slice. 

"Kyle, why didn't you just make something else?" you might ask. That's because you, the readers, are incredibly rational people (read: I am not). More importantly, huge bags of cherries were two for five at the store! Hooray for cheap summer produce!

My solution: two-inch cherry pies. Just like Mama used to make, if your mama baked everything to 1/12th the scale of normal baked goods.


Ingredients:
3/4 c dark brown sugar
4 tbsp cornstarch
5 c cherries, pitted and chopped
3 tbsp molasses
1 1/2 c whole wheat flour
1/2 tsp salt
3 tsp cinnamon
2 tsp ground clove
1 stick of unsalted butter, cold
5 tbsp Ice water
2-inch brownie tin

Time commitment: 30min inactive, 30min active, 10min hyperactive
Estimated cost: about $10 for 20 mini pies

First thing to do is to make the crust. Take a cold stick of butter and a pastry blender and go to town cutting up the butter into tiny balls of fat. Don't let the butter warm up or else your crust might not come out flaky!

Mix the flour in spices in a bowl and subsequently blend these ingredients into the butter with the pastry blender or with your hands. Once combined, shape the dough into a large ball and wrap it in wax paper. Place the dough in the fridge for 30min.


Next, make the pie filling by painstakingly cutting all of those delectable cherries in half and removing the pits. Pits will not contribute positively to the gooey consistency of your pie.


Coarsely chop up half of the cherries by hand and put the other half in a food processor to be lightly pureed. This will give you nice a mix of textures throughout your pie filling ranging from chunky to slushy.

Put the all of the cherries in a saucepan and stir in the molasses. Heat of high for about 5 minutes to extract all of those cherry juices. In a separate bowl, mix the brown sugar and cornstarch together until they are well combined. Then, add the sugar starch mix into the bubbling cherries and boil for an additional minute, stirring more than occasionally. Remove the pie filling from heat and allow to cool completely.


Take your chilled pie dough out of the fridge and roll it out into a single layer about 1/4 inch thick. Find a random kitchen implement in your home in the shape of a circle, such as a filter inside a stovetop espresso maker (or a cookie cutter, coffee cup or glass). Use said random implement to cut small circles in your rolled out dough, pressing these into a thin layer along the walls of your 2-inch brownie tin. Re-roll the dough and repeat until all of the dough has been used up. Or until you get tired.


Make sure to prick the bottom and sides of each shell with a fork before baking (a process called "docking") to prevent puffing and blistering of the crust. Bake the pie shells for 20 minutes at 350F. Then, remove the shells, spoon in the cherry filling and bake for an additional 10 minutes.

Throughout the baking process, I found it highly amusing to sing "sweet cherry pie" to the tune of "Sweet Caroline" by Neil Diamond. I don't know many of the words to that song, so I basically just sang the chorus over and over again. I'm sure that didn't annoy Jenn.


Good pies never seemed so good.

Happy Crafting!


Thursday, July 17, 2014

Craftertaste Special: Macarons with Friends


Macarons. No, not macaroons, macarons!

I have been seeing these all over New York recently. I think they've actually been there the whole time and I've just been ignoring them; I assumed that the taste couldn't match the curb appeal. But after I walked into the La Maison du Macaron on 23rd street, I realized that every minute of my life before that moment had been wasted not eating macarons.

Is it the most over-engineered cookie you've ever eaten? Or maybe a cake disguised as a small sandwich? Let's be honest: it looks like a lot like an Oreo that has let itself go.

Macarons may look and taste simply delicious, but it turns out they are fairly challenging to make (read: even I have my limits!). So for this one I had to call in re-enforcements. Enter Emily, Eva, and Jacie. And Martha Stewart. People who actually know what they're doing! Hooray!

Did I mention Martha Stewart? I did. Awesome. 

For this Craftertaste special event, we all decided to try to recreate the macaron a la Martha Stewart's recipe, which can be found here. I'll walk you through what we did, and add in a couple of tips that Emily showed us as we traipsed about in macaron land. And what would this post be without an obligatory Craftertaste cartoon??


After first whisking together the almond flour and sugar, we went ahead making the egg white "meringue" that would give our macarons their chewiness on the inside and a hard shell on the outside. Here, we just used egg whites from the carton left out on the counter for about 30 mins (to get them to room temp), substituting one serving size per egg. No yolk separation necessary! 

Beating together the egg whites, cream of tartar and superfine sugar in a stand mixer yielded "stiff peaks" that look a little something like this.


When we folded in our flour mixture into the egg white mixture, a rich and creamy batter formed that we lopped into a pastry bag. Don't have one of those? A Ziploc with a corner cut off will do the trick. Just dont forget to seal the Ziploc before you start piping!


Emily actually had a silicone macaron baking sheet (who has that??) that we piped the batter onto, with its tiny silicone rings to keep the batter in a nice uniform circle. At the end of the day though, we realized the batter that we added directly onto parchment paper came out slightly better, as these cookies were easier to remove from the sheet after baking.


Don't forget to tap the baking sheets on the counter before baking! Air bubbles son no bueno.

For the cream filling, we followed a buttercream recipe (here) supplemented with one tbsp of vanilla bean paste. I know what you're thinking, and yes, the vanilla bean paste DOES have to be from Madagascar, you heathen! (No, it doesn't). For half of the buttercream, we removed it to a separate bowl after mixing and stirred in two tbsp's of instant coffee for filling variety.

What's that you say? Buttercream soup is splattering about and desecrating your otherwise spotless kitchen? Emily has the answer.


If you read the recipe hyperlinked above, you'll realize that Martha Stewart wants you to bake your macarons by letting them sit at room temperature for 15 minutes, followed by baking them in an oven that has been pre-heated to 375 but immediately turned down (for what!) to 325 prior to putting your cookie-laden baking sheet in the oven. To many, this will seem like baking voodoo. You might as well sacrifice a stick of unsalted butter upon a tiny altar before baking them. But hey, it's hard to argue with results.


I should mention that up until this point Emily has actually done 90% of the work while the rest of us tried to look busy. However, everyone could be found constructing the macaron sandwiches at the end. Look at how much fun we're having!


I have to say, the end result turned out much better than expected. I mean, we even got the little crinkly bits coming off the edges of each cookie ("feet"). Go team!


If you're thinking of making your own macarons, save time and macaron with friends! Especially friends that like to do a lot of the work for you.

Honorable mentions: Tommy, for serving us wonderful beer throughout the process. Geoff, Jillian and Ryan, for playing Settlers of Catan.

Happy Crafting!
Thursday, June 19, 2014

Chocolate Granola


Hmm... What to eat for breakfast...

Cereal? Boring.

Yogurt? Blah.

English muffin? Again?? No way.

I've got your solution in the form of crunchy, chocolatey, nutty goodness.

Feed your inner (and outer) hippie with this chocolate granola!


Ingredients:
3 cups rolled oats (quick oats)
1/2 cup of each of the following: pecans, dry roasted peanuts, shelled pistachios, cocoa almonds
1/4 cup light brown sugar
1/4 cup cocoa powder
1/4 cup extra light olive oil
1/4 cup honey
1 tbsp ground cinnamon

Time commitment: 1hr 15min... But it's worth it!
Estimated cost: 15$
Yield: a LOT of granola


Preheat the oven to 250F. Chop all of the nuts to a medium-coarse chop and stir together with the rolled oats in a large bowl. Add in the brown sugar, cocoa powder and cinnamon and stir to evenly coat the nuts and oats.

In a separate bowl, mix together the honey and olive oil. They don't really come together well, but this helps to distribute them both on the granola mix at the same time. Add the mixed honey and oil to the nuts and grains and stir to coat.

Dump the coated granola mixture onto a parchment paper lined baking sheet and spread the granola around into an even layer. Into the oven it goes!


Bake the granola for 40 minutes at 250F, then bump up the temp to 300F and bake for an additional 20 minutes. Be sure to turn the granola with a spatula every 20 minutes to avoid burning it!

At this point, you're realizing that an hour is a long time. As someone who's willing to take the time to make their own granola, I have a few suggestions as to how to pass the time:

(1) Do a second round of yoga. Lots of child's pose.
(2) Backcomb your dreadlocks.
(3) Repair your torn tie-dye shirts with peace sign patches.
(4) Watch "The Best of Burning Man" on DVD.

Hopefully you enjoyed doing all of those things! I know I did (not). Remove the granola from the oven and scrape it into a large bowl to cool. How good does that smell?

Spoon your favorite yogurt into a bowl and top it off with some chocolate granola. You could even put it on top of some strawberry mousse (wink wink nudge nudge). Or just eat it by the handful; a particularly attractive idea for those without spoons. Store excess cooled granola in a Ziploc bag to preserve its crunchiness.


Going on a hike because your significant other is way more active than you are and enjoys watching you suffer? No worries! Throw some chocolate chips and dried cranberries in that same Ziploc bag and you've got yourself some mighty fine trail mix. 

It won't make the hike easier, but keeping your mouth full will stop you from complaining too much (like I do)!

Happy Crafting!

Saturday, April 26, 2014

"Spring Chicken" Cookies


Ah... Spring is in the air.

Even in New York, the weather is reaching the mid 60's this weekend. Let us rejoice!
Hopefully you're reading this blog on your phone while doing yogalates in Central Park (or something analogous to that).

Perhaps the most hateful expression related to Spring that I know of is "I'm no spring chicken". People always say this with such disdain. Sure, spring chickens might be naive. Maybe they were even born yesterday. But I'm sure they are perfectly friendly little birds that deserve some love.

Help me celebrate the joys of Spring and its chickens with these aptly named spring chicken cookies.


Ingredients
1 cup vegetable oil
1 cup granulated sugar
2 eggs
1 tsp mint extract
4 tbsp lemon juice
2 1/4 cups all-purpose flour
1/2 tsp baking soda
1 tsp salt
Peeps!! (You choose the color)
Green food coloring (optional)


Yield: roughly two dozen
Estimated cost: about 12$ per batch
Time commitment: 30 mins

I know what you're thinking. Yes, you can eat some of the Peeps now.

Nothing says "Spring" like a fresh package of Peeps - the marshmallowy treat that makes you feel all warm and gooey and sick inside. Say "Spring!!" louder and prouder by placing them atop delicious sugar cookies.

Whisk the sugar, oil, mint extract and lemon juice together in a large bowl until it comes together. Crack the eggs into the bowl and combine thoroughly. In a separate bowl mix together the flour, salt and baking soda. Then, fold the flour mix into the wet ingredients, about 1/3 of the volume at a time. Fold with a spatula and avoid over mixing for softer cookies.


Place 1 inch blobs of dough onto a cookie sheet lined with greased tin foil. Bake the dough for 10 minutes at 350F.

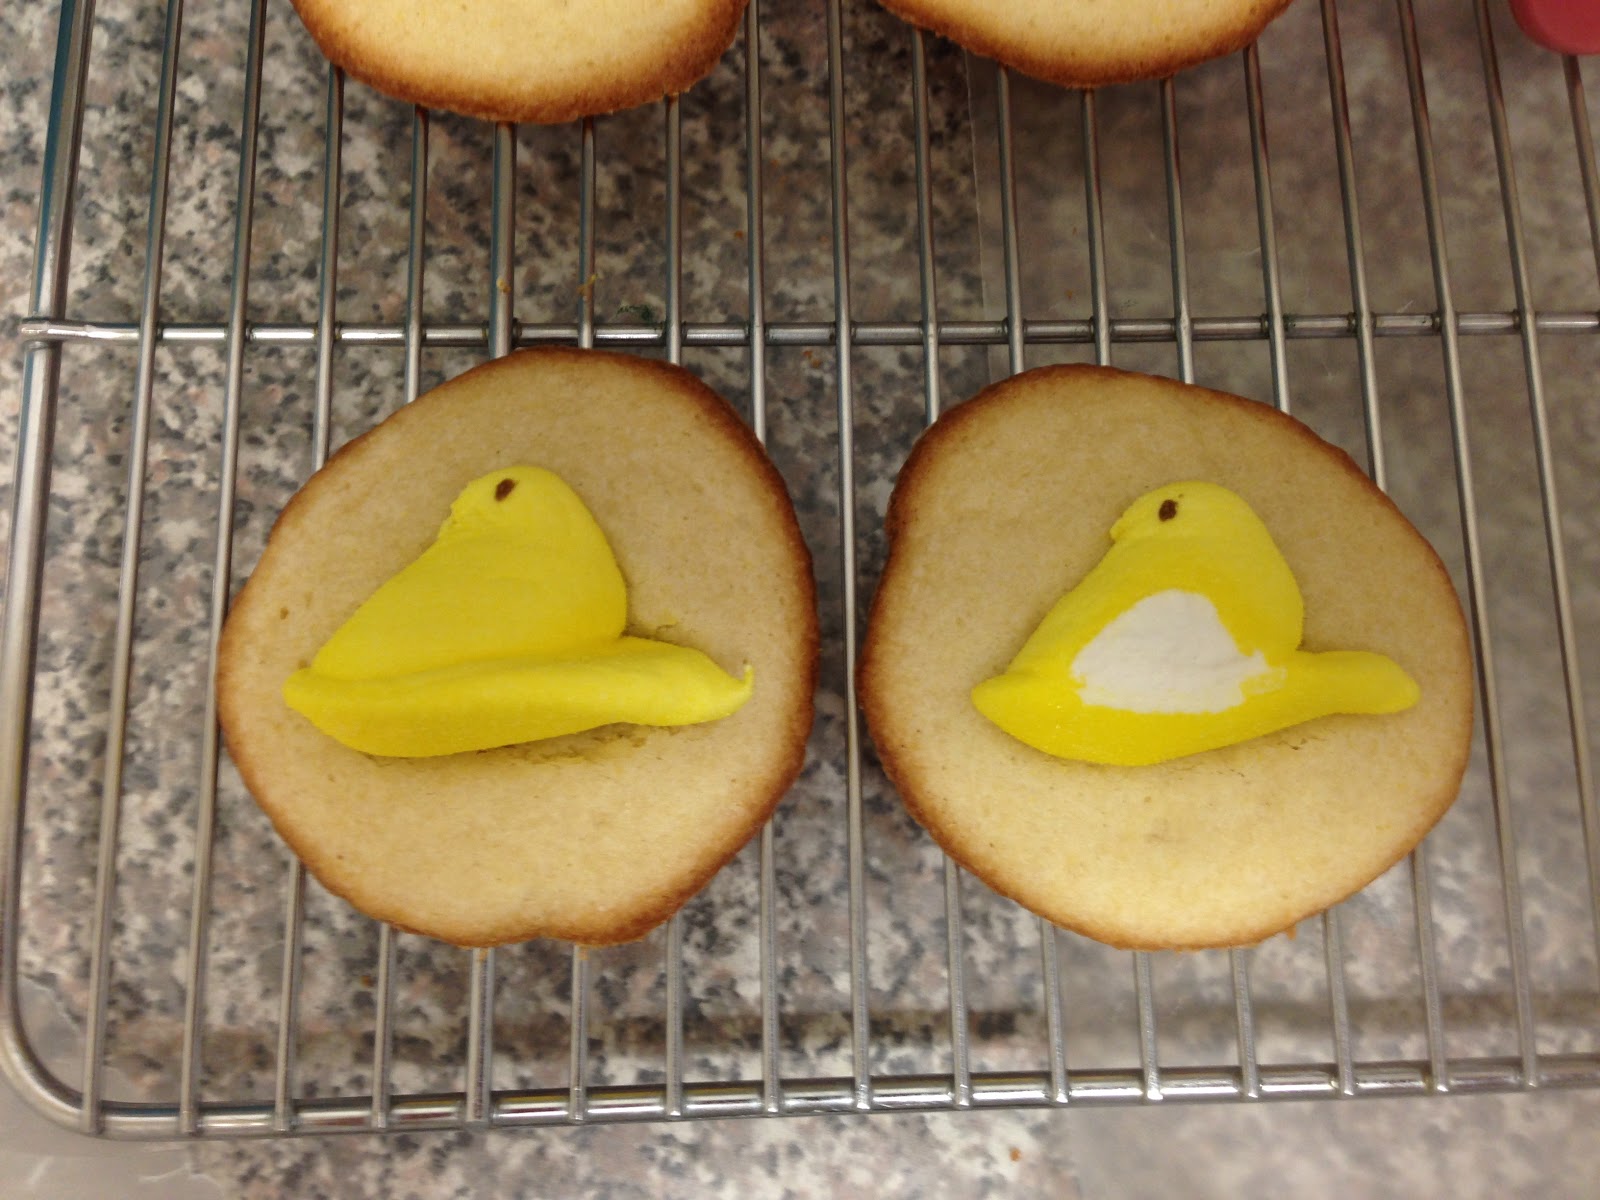
While the cookies are in the oven you might be asking "what should I do with the few Peeps I haven't already consumed"? Get out a cutting board, channel your inner serial killer and chop those bad boys in half, either lengthwise or separating the head from the tail.


First, I tried baking the cookies with the Peeps already on top.


Hey, I'm not perfect. Tasty for the mouth, but not for the eyes. Ironically, they melted to look like fried eggs.

Here's a better idea:

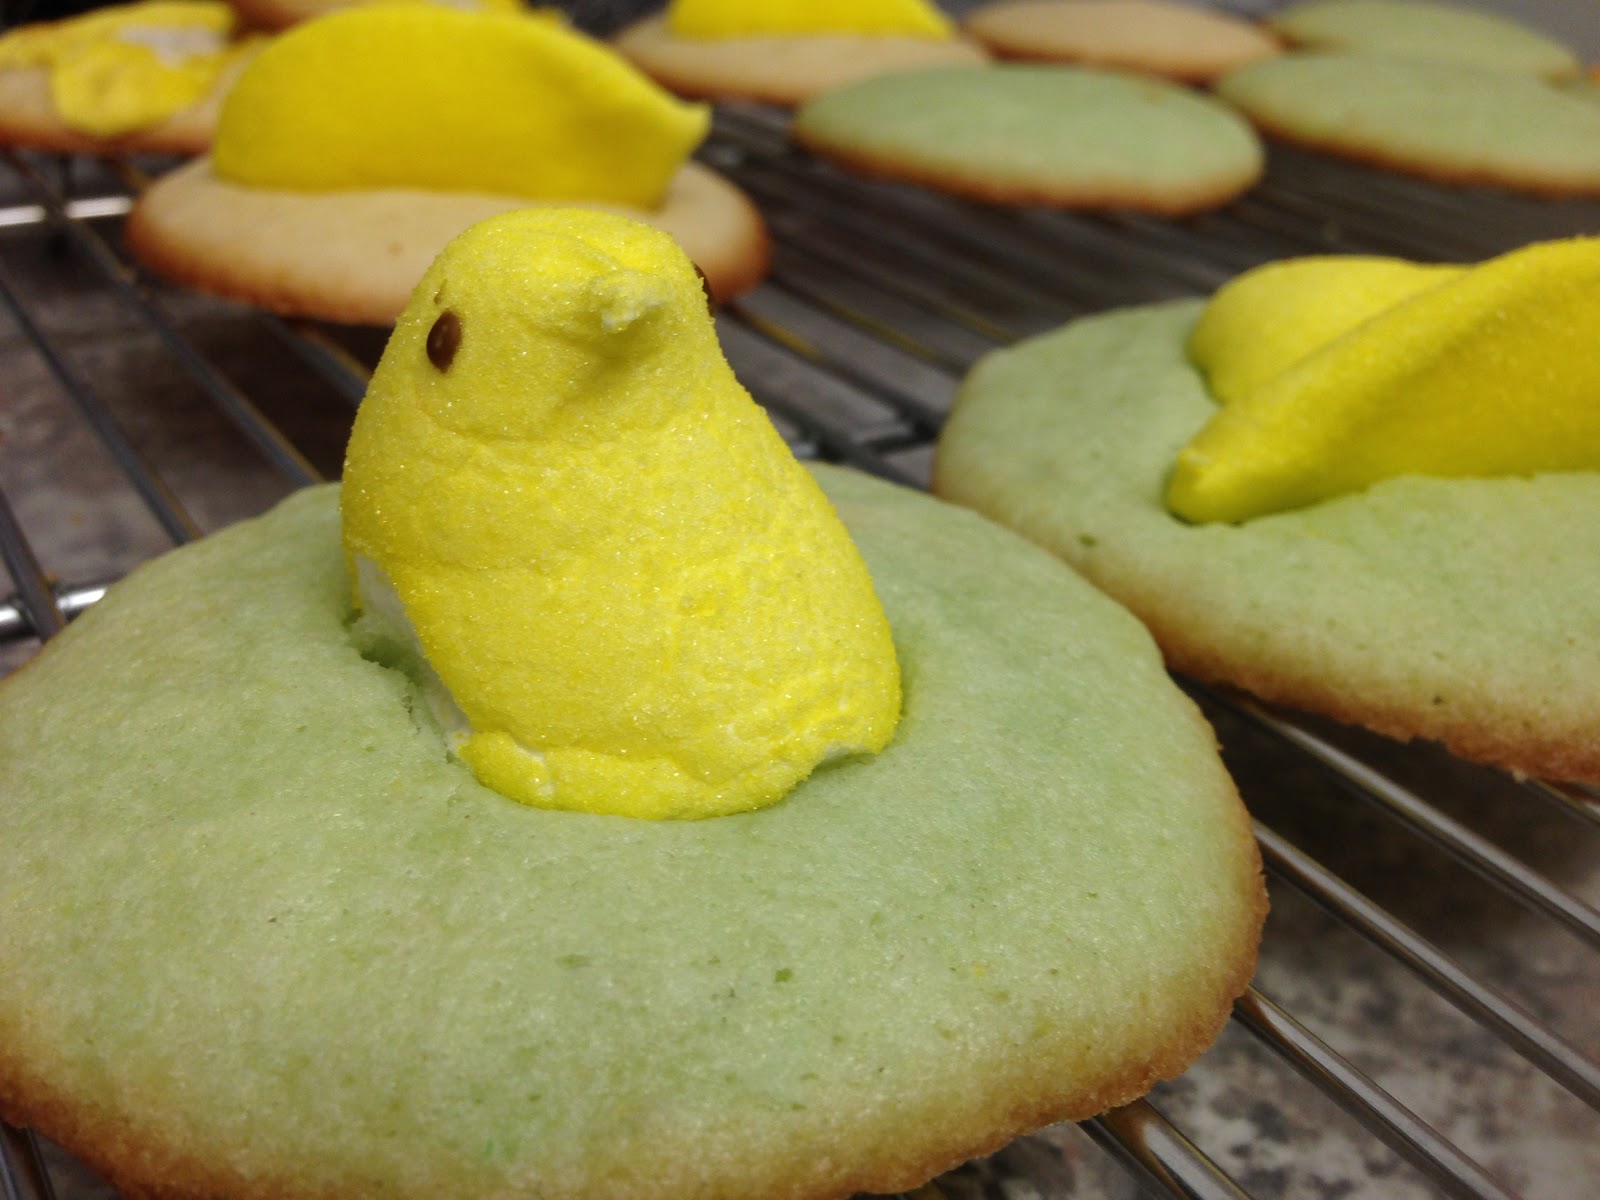
After 10 minutes of baking, remove the cookies from the oven and immediately lay the slaughtered Peeps flat on top of each cookie. Press the Peep lightly into the dough. Leave the cookies to cool on the sheet for at least two minutes before moving them to a wire rack. The Peeps will fuse with the dough during the cooling process.


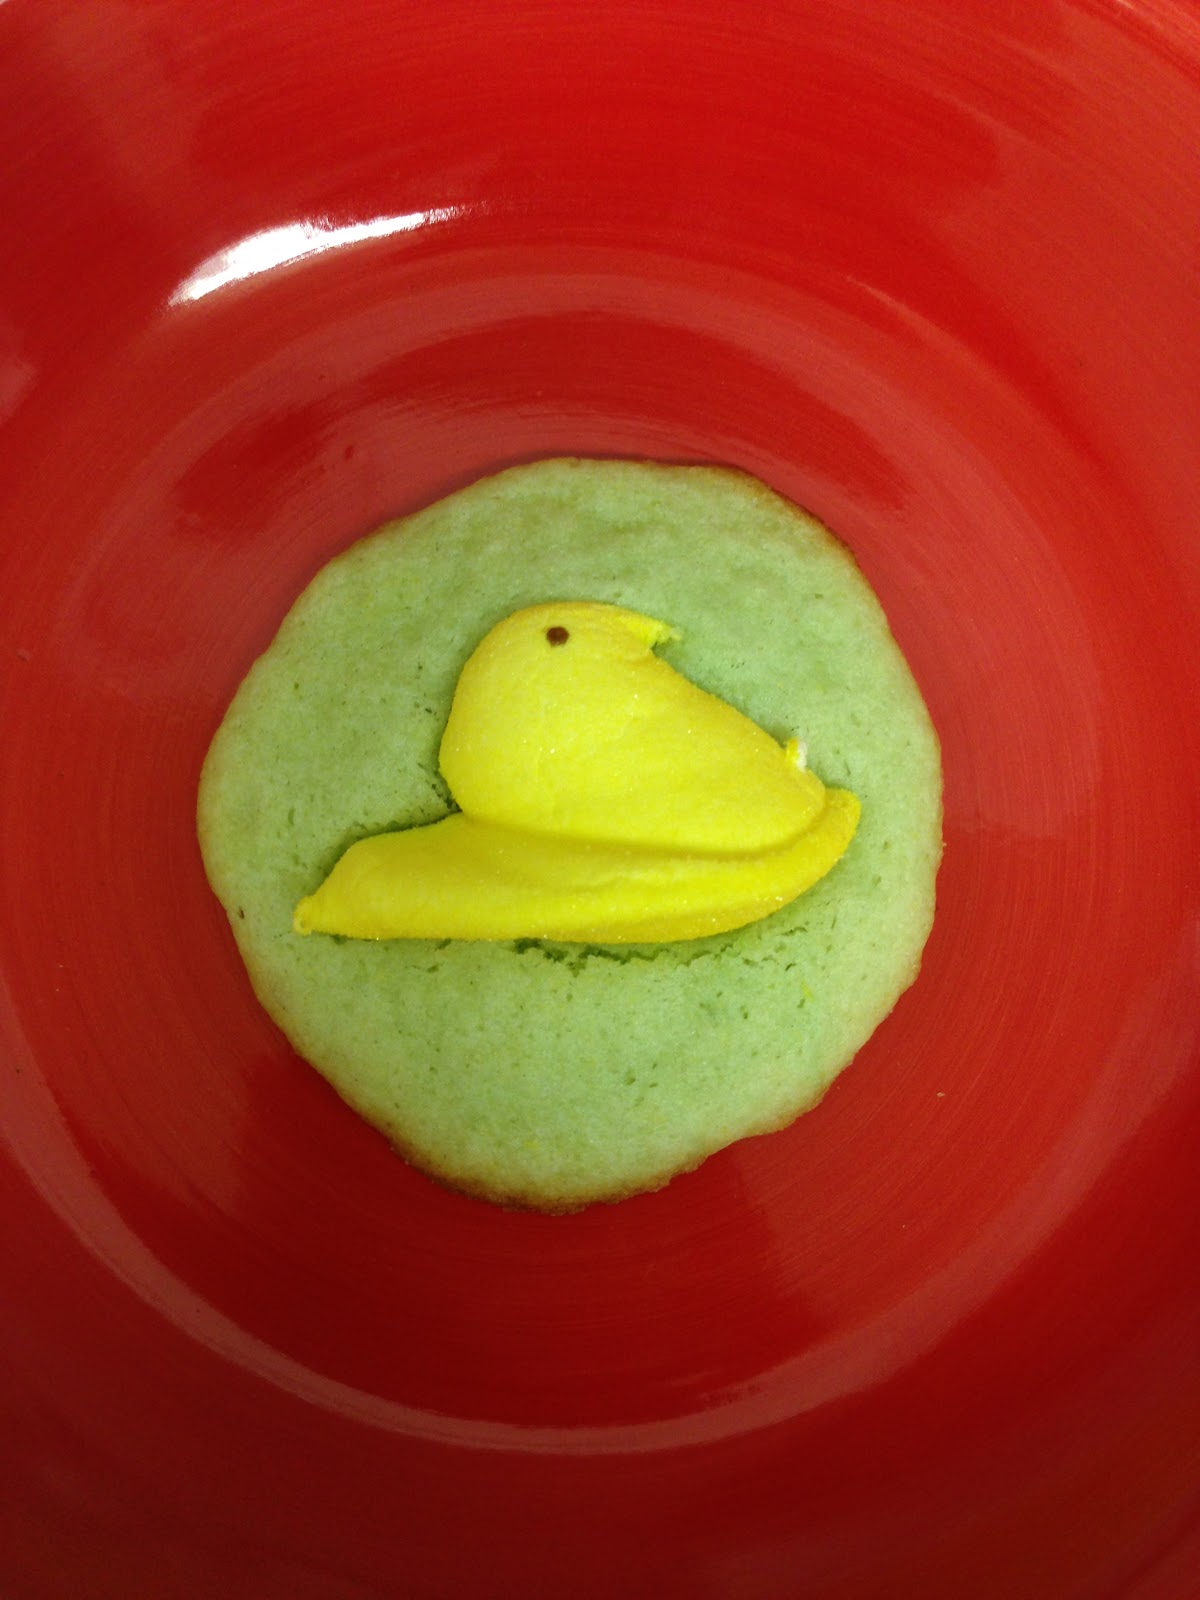
Want to get really fancy? Add a bit of green food coloring to your batter (maybe 4 drops) before baking to make those mallow chicks really pop.


While not legally allowed to say so, I like to think of these cookies as "reduced calorie" since I only used half a Peep per cookie. (This last sentence can also be found under the definition of wishful thinking).

If you want to have a truly low-cal cookie experience, I recommend just looking at the cookies instead of eating them.


Happy Spring Everyone!

Saturday, April 5, 2014

Blackstrap Molasses Cookie Sandwich

Bakers, this one's for you. Eaters of cookies, this one is also for you.

Every time I find myself baking something, what I plan to bake and what I actually end up baking are two completely different things. Maybe that means I have a short attention span. Or maybe I just have a need to continuously take things to the next level of sugar and fat content?

What was I saying again? Oh, right. Cookies.

This is a perfect example. It was a Sunday night, and I thought "I really feel like making a batch of sugar cookies". While looking for ingredients I found my bottle of blackstrap molasses tucked away behind a large bag of brown sugar. About an hour later? A monstrosity the likes of which the molasses-loving community will be talking about for... probably a couple of minutes. But really solid minutes.

If they even read this blog.


Ingredients:
1 cup canola oil
2 large eggs
1 cup light brown sugar
1/3 cup granulated sugar
3 tbsp blackstrap molasses
2 1/4 cups all-purpose flour
1/2 tsp baking soda
1 tsp salt
2 tsp vanilla extract
Lindt dark chocolate squares (70%)

Time commitment: 30 minutes, including baking and licking raw cookie dough from the bowl
Yield: About 20 sandwiches

Preheat your oven to 350F before starting. Combine the sugars, molasses, oil, vanilla and eggs into a large bowl, and mix by hand until combined. Mix the flour, salt and baking soda in a separate bowl and then fold into the wet ingredients with a spatula, about a third of the dry ingredients at a time. Use a 1/2 tbsp scoop to place balls of dough (which should be dark brown and sticky) about an inch apart on a cookie sheet lined with greased tin foil. (Don't have cooking spray? Pour some canola oil on a paper towel and spread around the foil in a light layer to grease. Voila!)


Bake for 8-10 minutes at 350F. The cookies will look brown and delicious. If they look a bit underdone, that's great. Trust me, it's the way you want it. As long as they hold together for the next part, you're good.


Let the cookies rest on the cookie sheet for about 2 minutes. Then, use a spatula to dislodge the cookies. Open up the Lindt chocolate and place one square (or two, you sly devil you) on an overturned cookie. Top the chocolate with a second cookie. Remove unused cookies (to be eaten while you wait for the sandwiches) and bake for an additional 3 minutes at 350F. Let them cool for about 5 minutes before you put them on a wire rack to cool.

The result? Pure molasses decadence with a chocolate filling.


It looks like a chocolate and molasses post-Vesuvius Pompeii that was crushed by a giant molasses cookie. Or a sweet version of a slider. Or just two cookies with some chocolate in the middle.

What's that you say? Something about leftover dough? No problem: place it in a Ziploc, press the air out and stick it in the freezer. When you want more cookies, take the Ziploc out and thaw the bag in room temperature water for about 10min before using. Frozen dough is especially handy for those nights when you were so busy crafting that you forgot to make something for dinner #smartlifechoices.

Until next time, enjoy!